ValuPanel User Guide
Welcome to ValuPanel, your comprehensive cloud management platform designed for deploying and managing Odoo instances. This guide provides detailed instructions on using all features and functionality available in the ValuPanel web application.
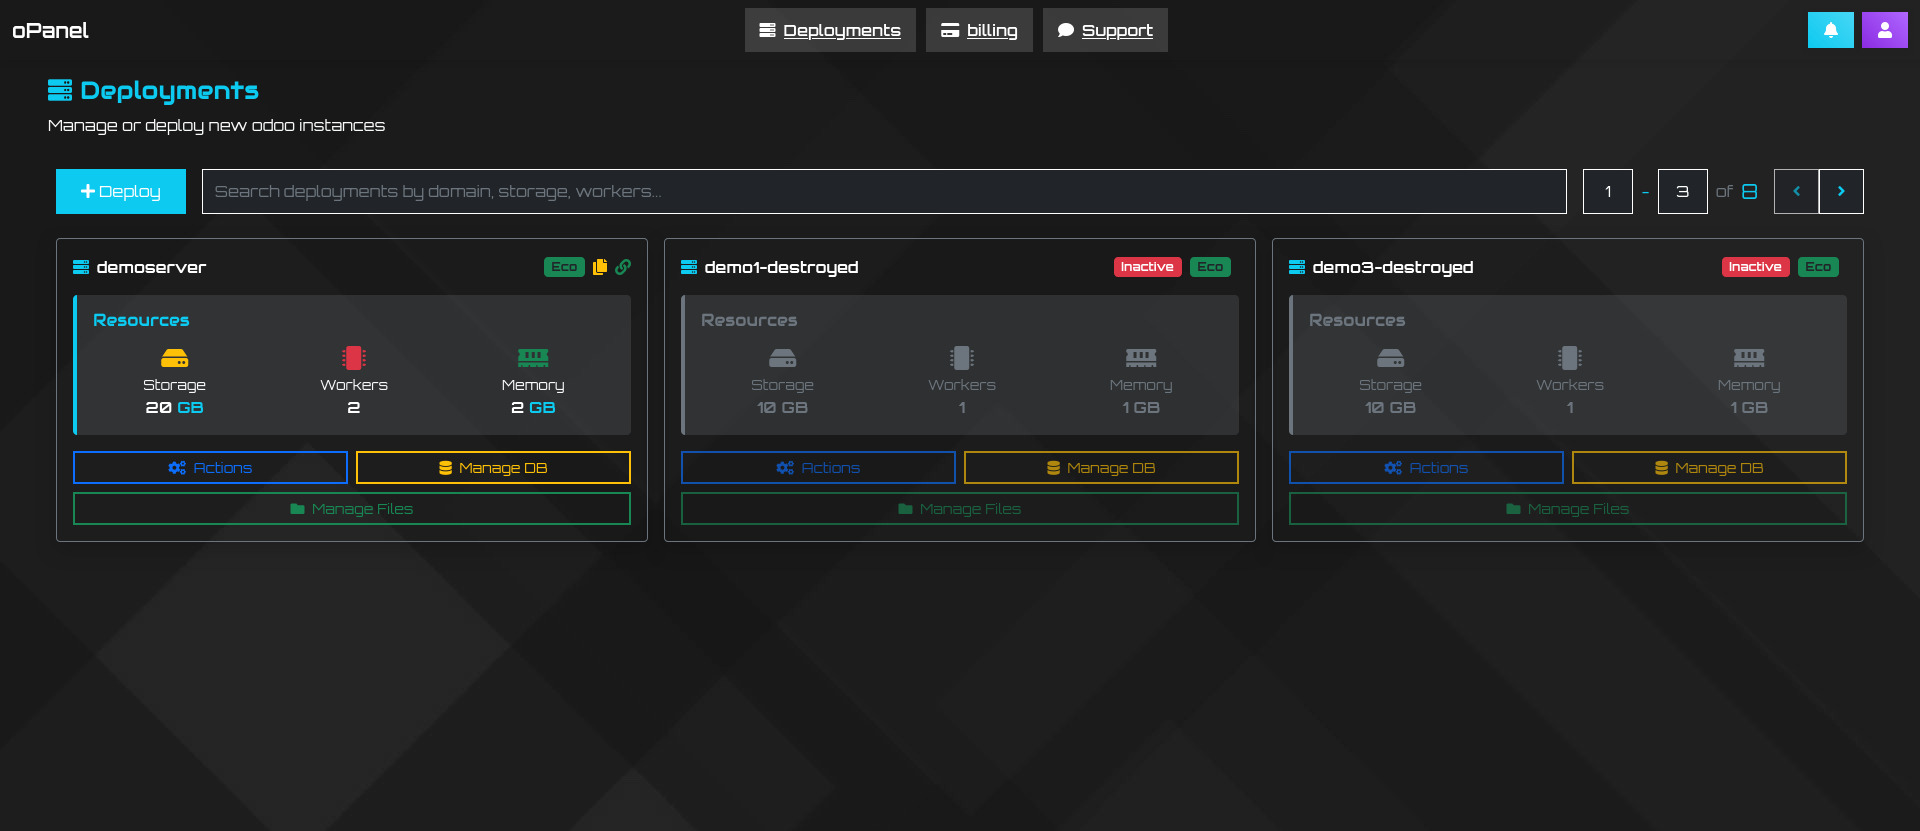
The ValuPanel deployment dashboard provides an overview of all your deployments
Account Creation
To start using ValuPanel, you'll need to create an account:
Step 1: Navigate to Registration
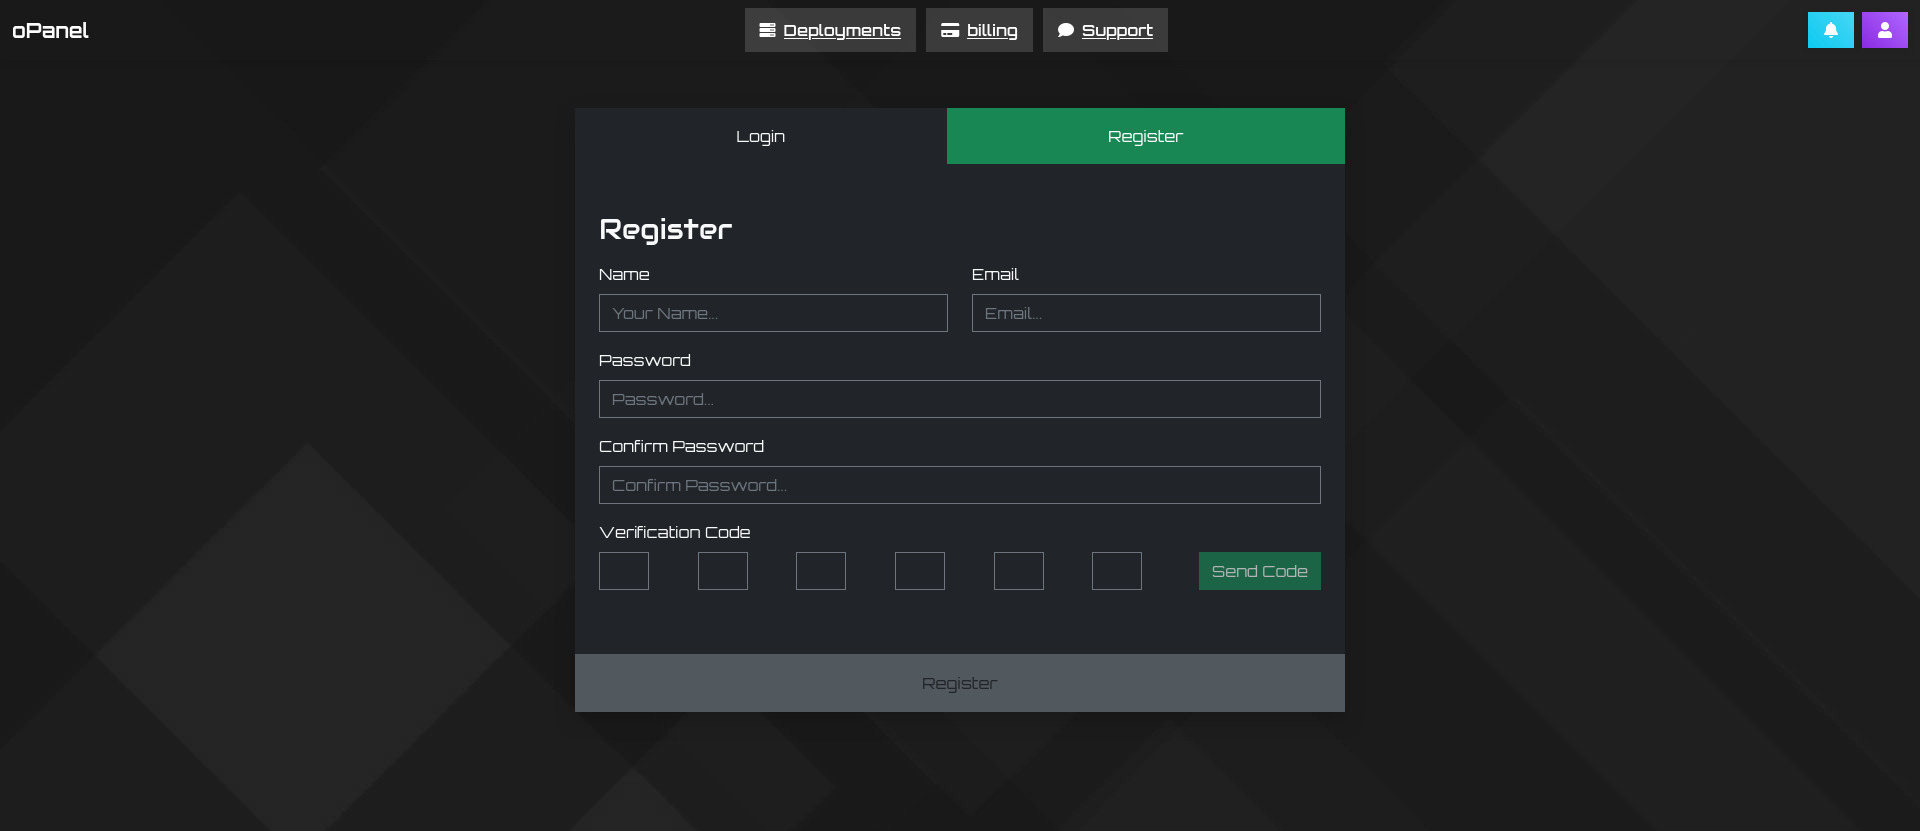
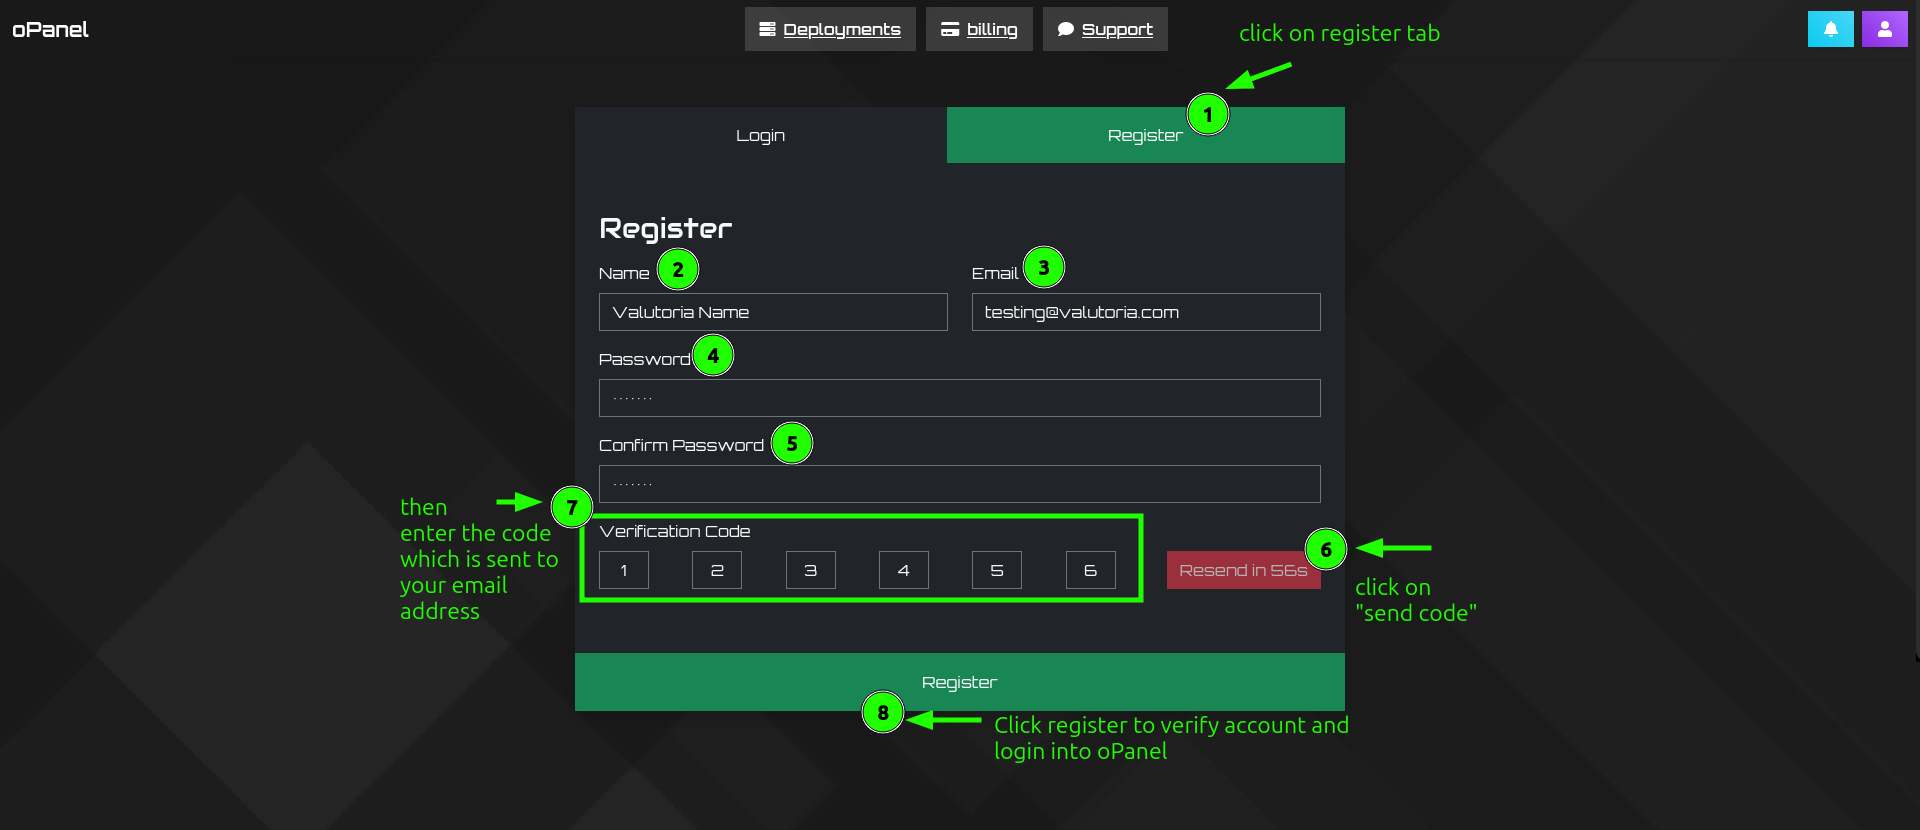
Access the ValuPanel login page and click on the "Register" tab at the top of the login form.
Step 2: Fill Your Details
Complete the registration form with the following information:
- Name
- Email address
- Password (minimum 6 characters)
- Confirm password
Step 3: Verify Your Email
Click the "Send Code" button to receive a verification code at your email address. Enter the 6-digit verification code sent to complete your registration.
Logging In
Once your account is created, you can log in:
Step 1: Access Login Form
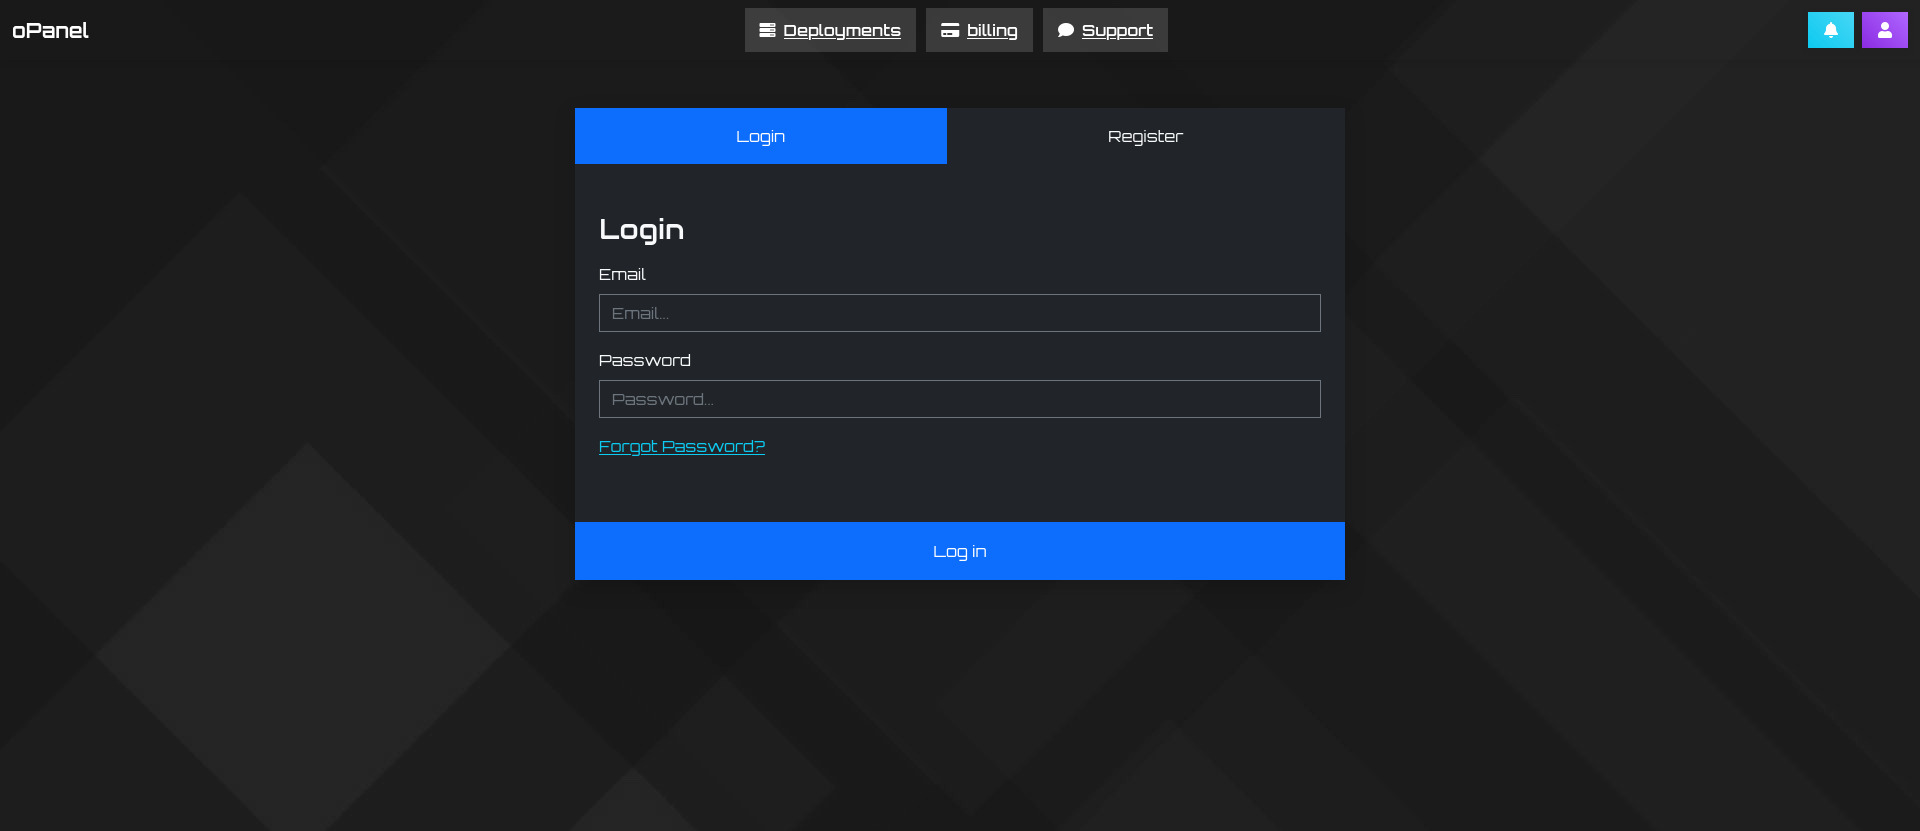
Navigate to the ValuPanel login page.
Step 2: Enter Credentials
Enter your email address and password.
Step 3: Access Dashboard
Click "Log in" to access your dashboard.
Password Recovery
If you forget your password, you can reset it using the following steps:
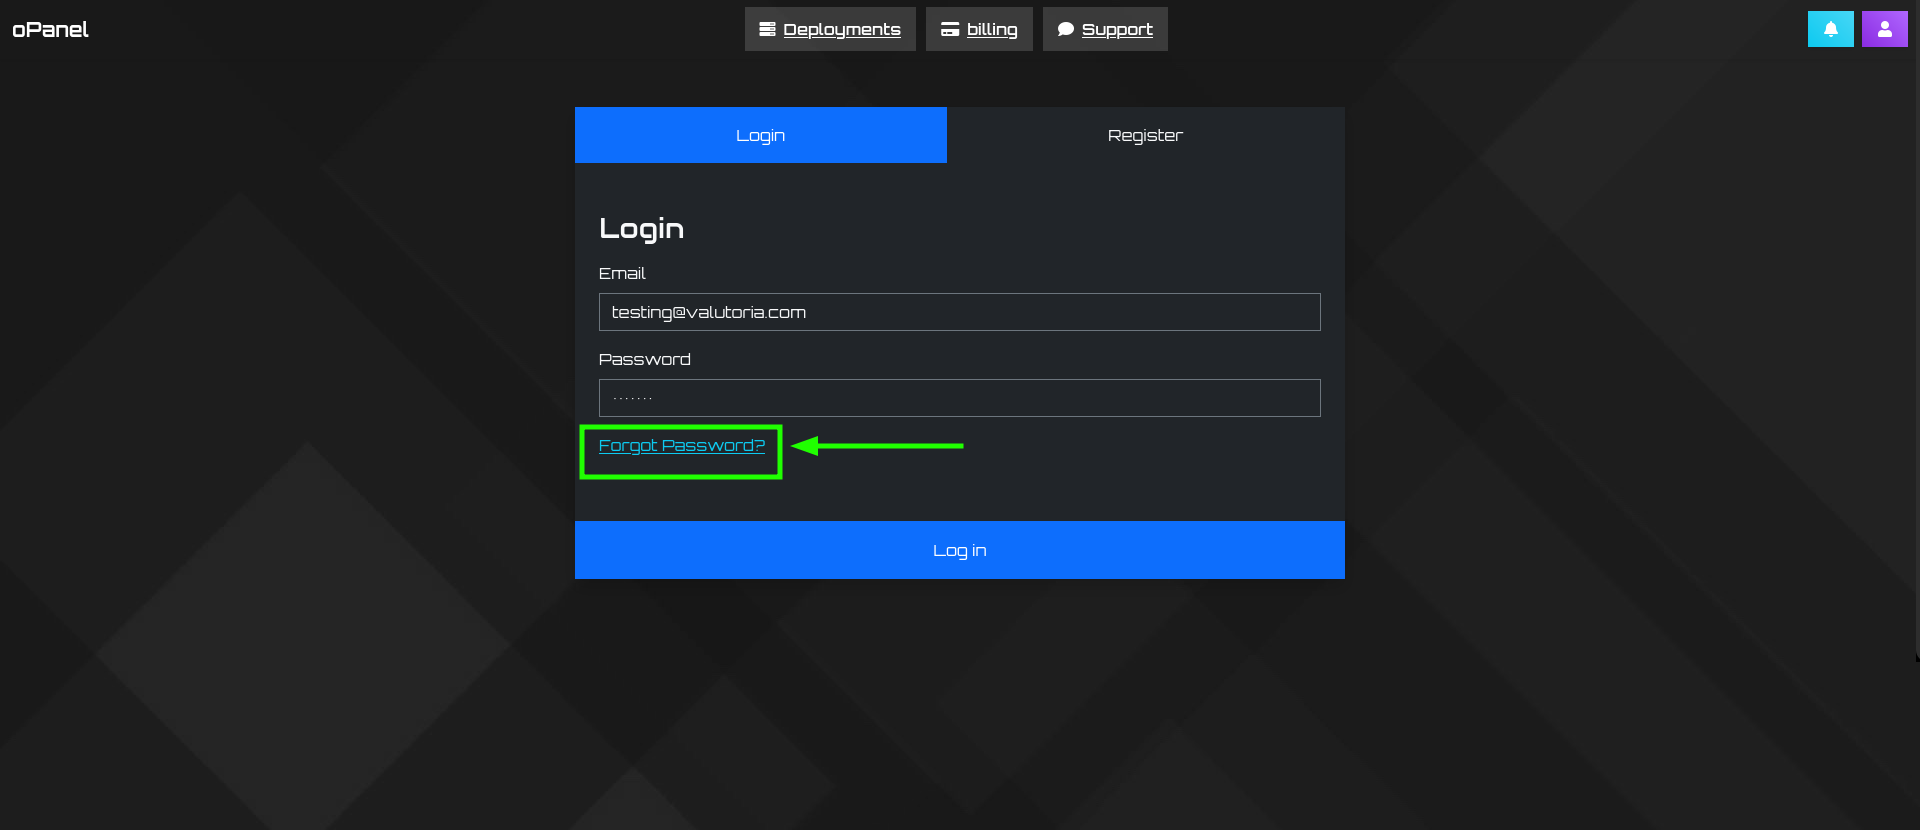
Step 1: Initiate Password Reset
Click "Forgot Password?" on the login screen.
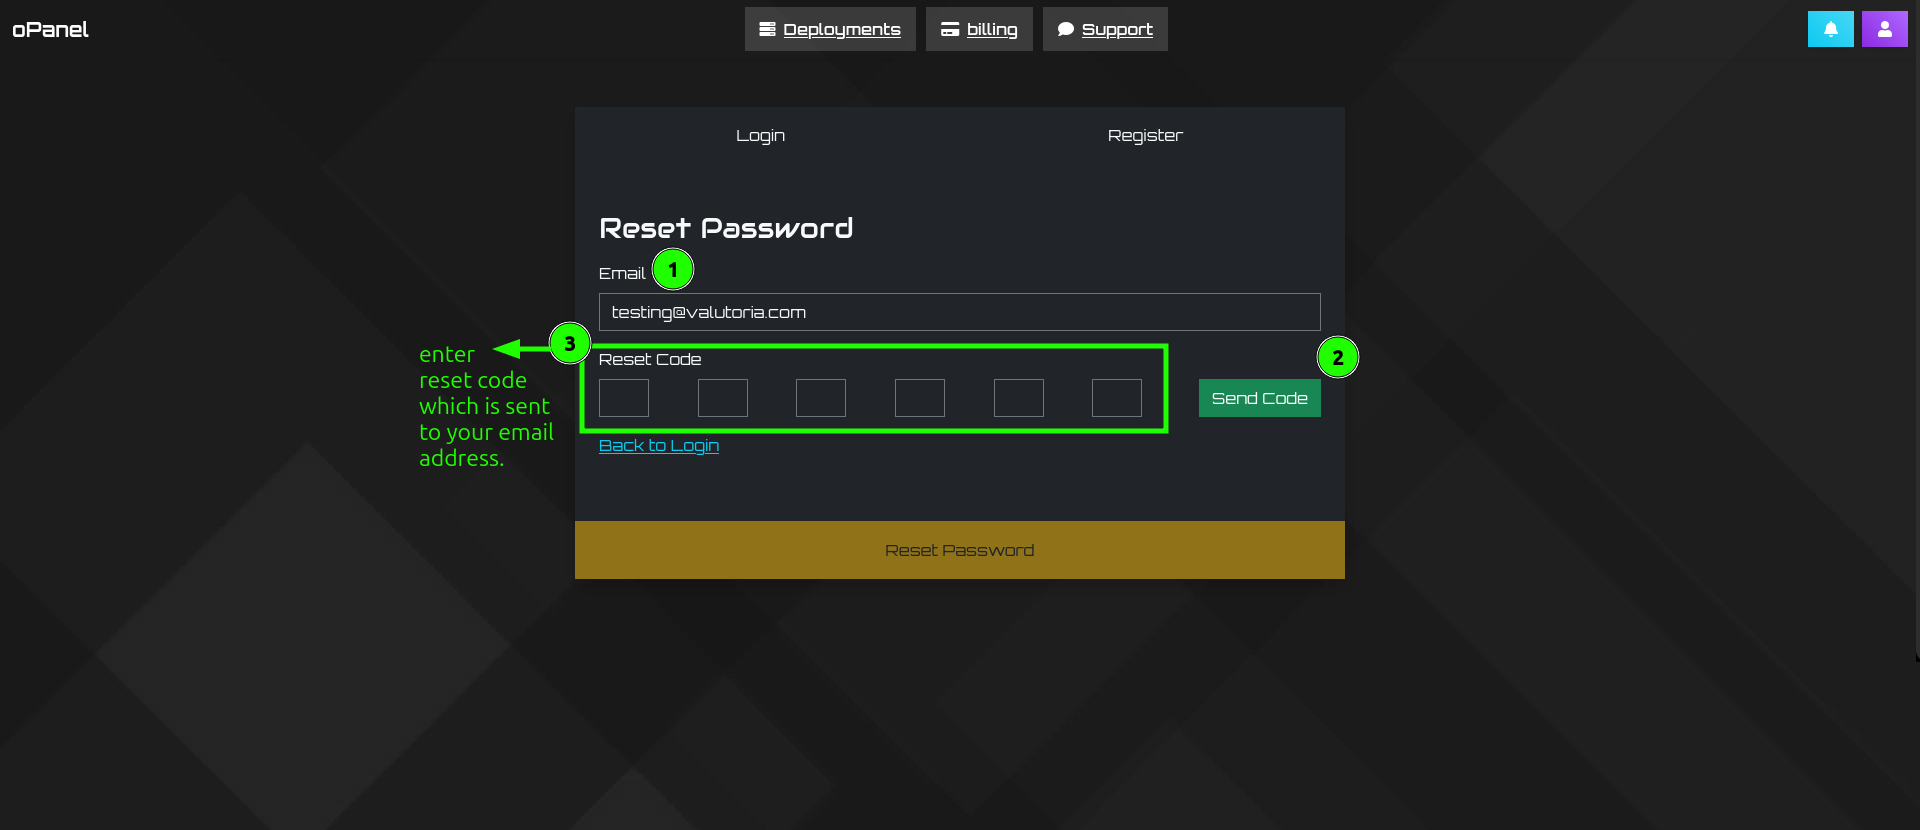
Step 2: Enter Email
Enter your email address and click "Send Code" to receive a reset code.
Step 3: Enter Reset Code
Enter the 6-digit reset code sent to your email.
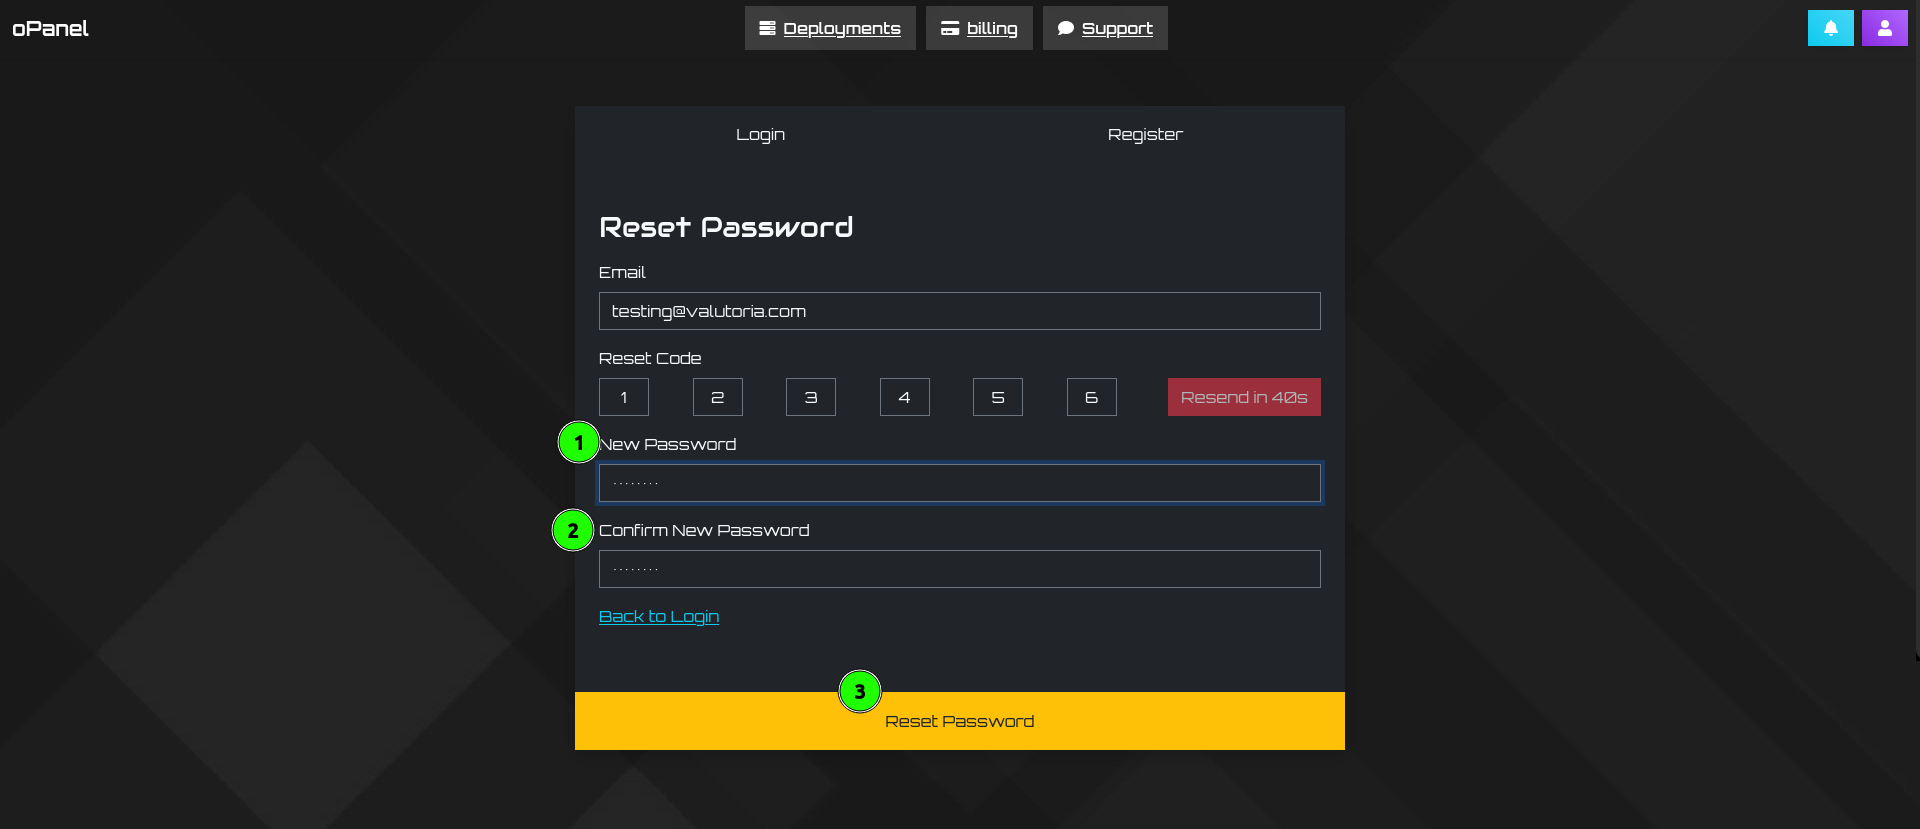
Step 4: Create New Password
Create a new password (minimum 6 characters) and confirm it.
Step 5: Complete Reset
Click "Reset Password" to update your credentials.
Navigation
The desktop view of ValuPanel consists of:

- Top Navigation Bar: Contains the ValuPanel logo, main navigation menu, and notification/profile buttons.
- Main Content Area: Displays the currently selected section (Deployments, Billingkeyboard_arrow_right Billing, or Support).
Navigation options:
- Deployments: Manage your cloud servers
- Billing: Access invoices and subscription information
- Support: Manage support tickets and get help
On mobile devices:
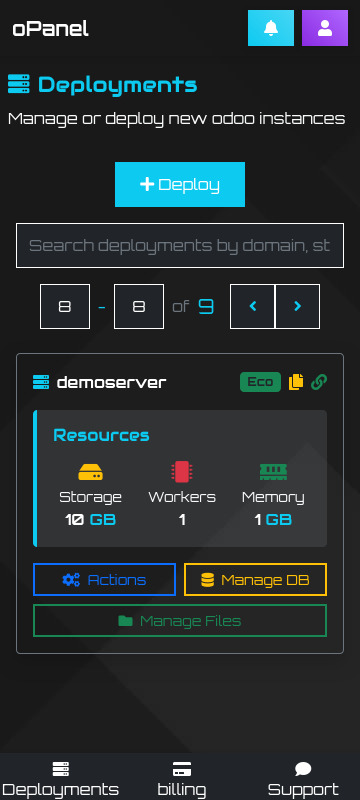
- The top bar contains only the logo and notification/profile buttons.
- Main navigation is accessible via a fixed bottom menu with icons for Deployments, Billing, and Support.
Viewing Deployments
The Deployments page displays a list of all your cloud servers. Each deployment card shows:

- Server domain name
- Status (active/inactive)
- Resource allocation (storage, workers, memory)
- Quick action buttons
You can filter and search deployments using the control panel above the list.
Creating a New Deployment
To create a new deployment:
Step 1: Initiate Deployment
Click the "Deploy" button in the control panel.
Step 2: Configure Deployment
Configure your deployment:
- Set the number of workers (1-8)
- Select a plan (ECO, PLUS)
- Choose billing cycle (Monthly, Yearly)
- Enter a subdomain name (will be created as [subdomain].valutoria.com)

Step 3: Complete Payment
Click "Pay with Credit Card" to complete the deployment process.
Deployment Actions
For each deployment, you can perform several actions:
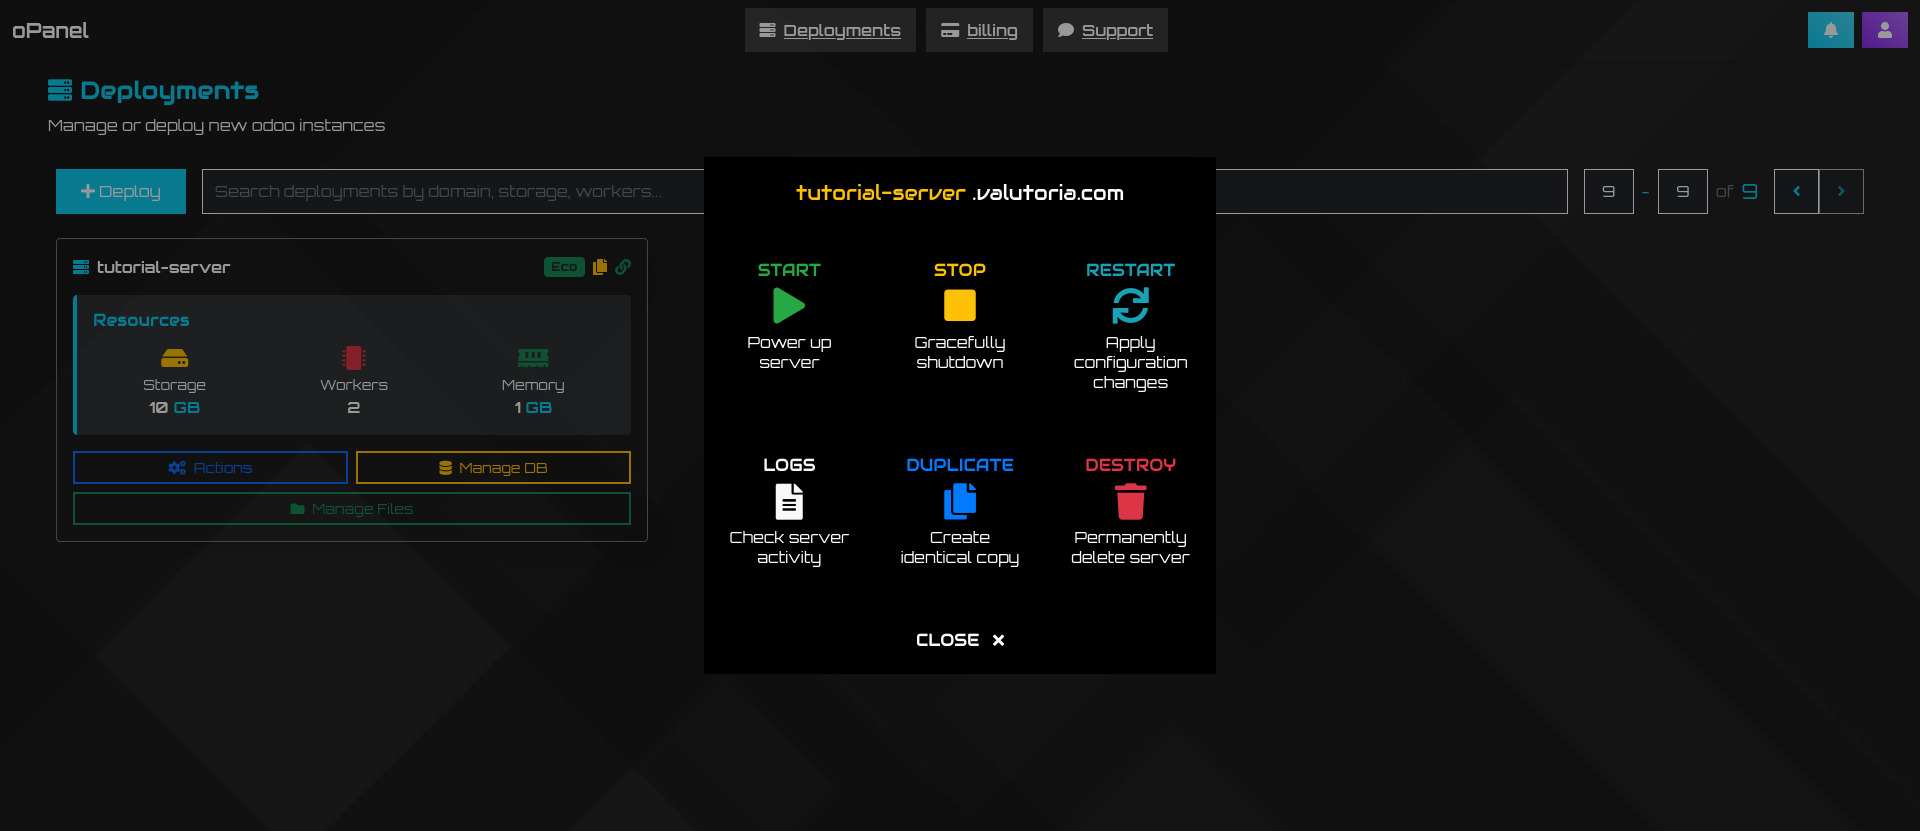
| Action | Description |
|---|---|
| START | Power up the server |
| STOP | Gracefully shut down the server |
| RESTART | Apply configuration changes and restart |
| LOGS |
Check server activity logs
|
| DUPLICATE | Create an identical copy of the server |
| DESTROY |
Permanently delete the server (requires confirmation)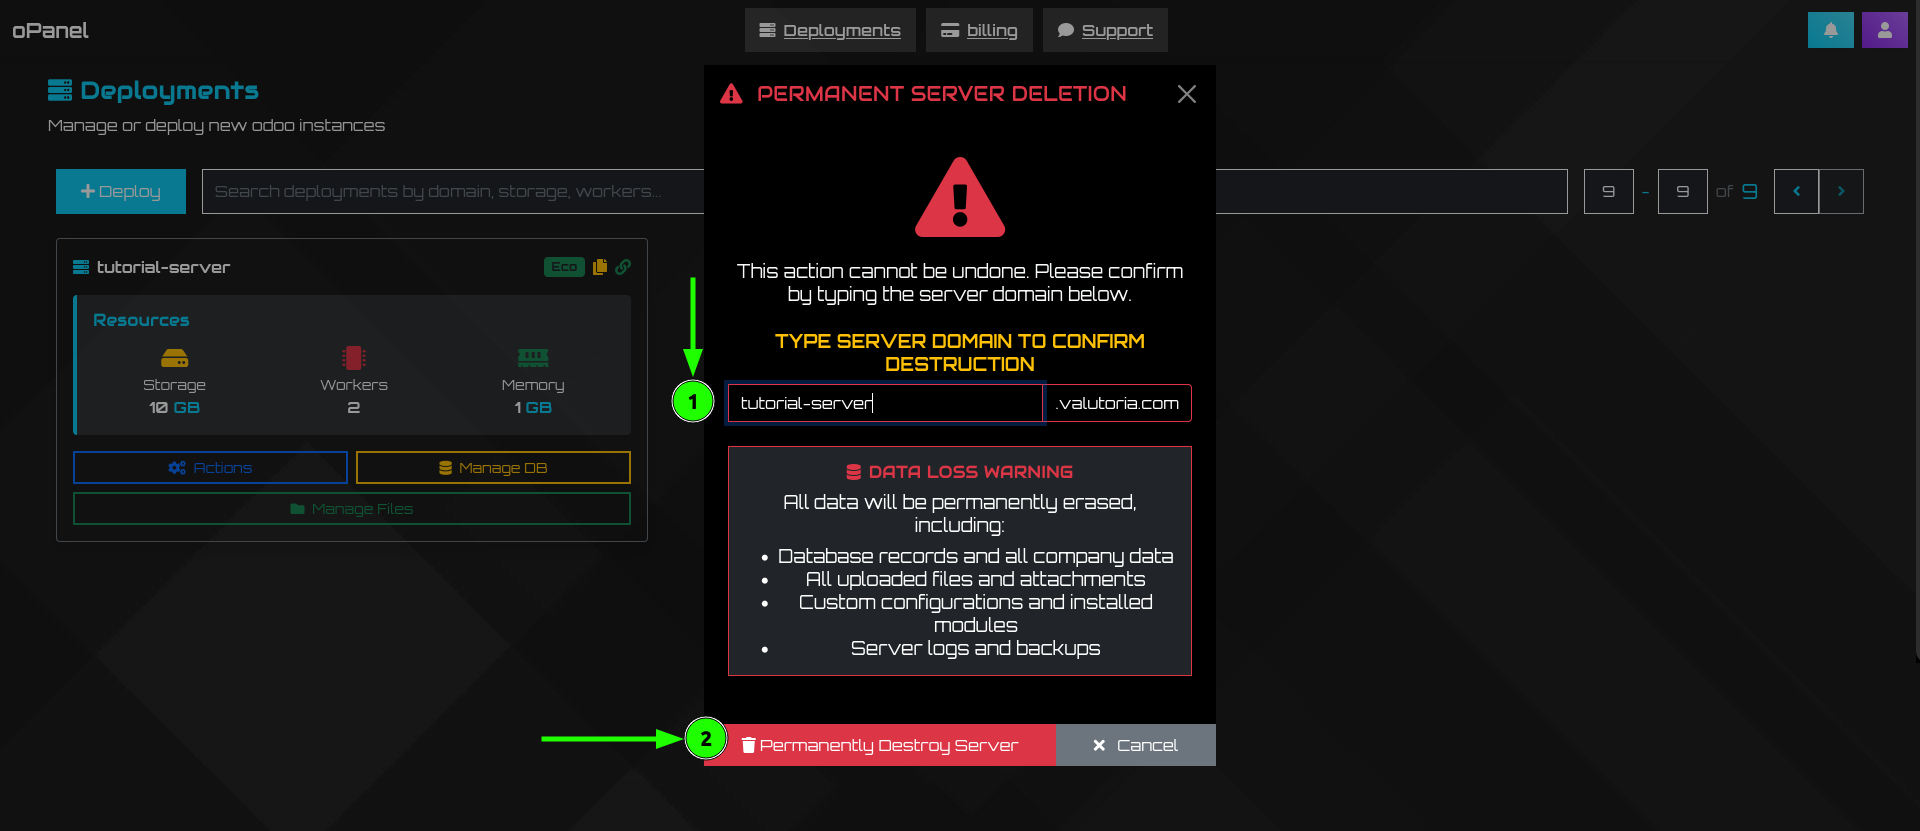
|
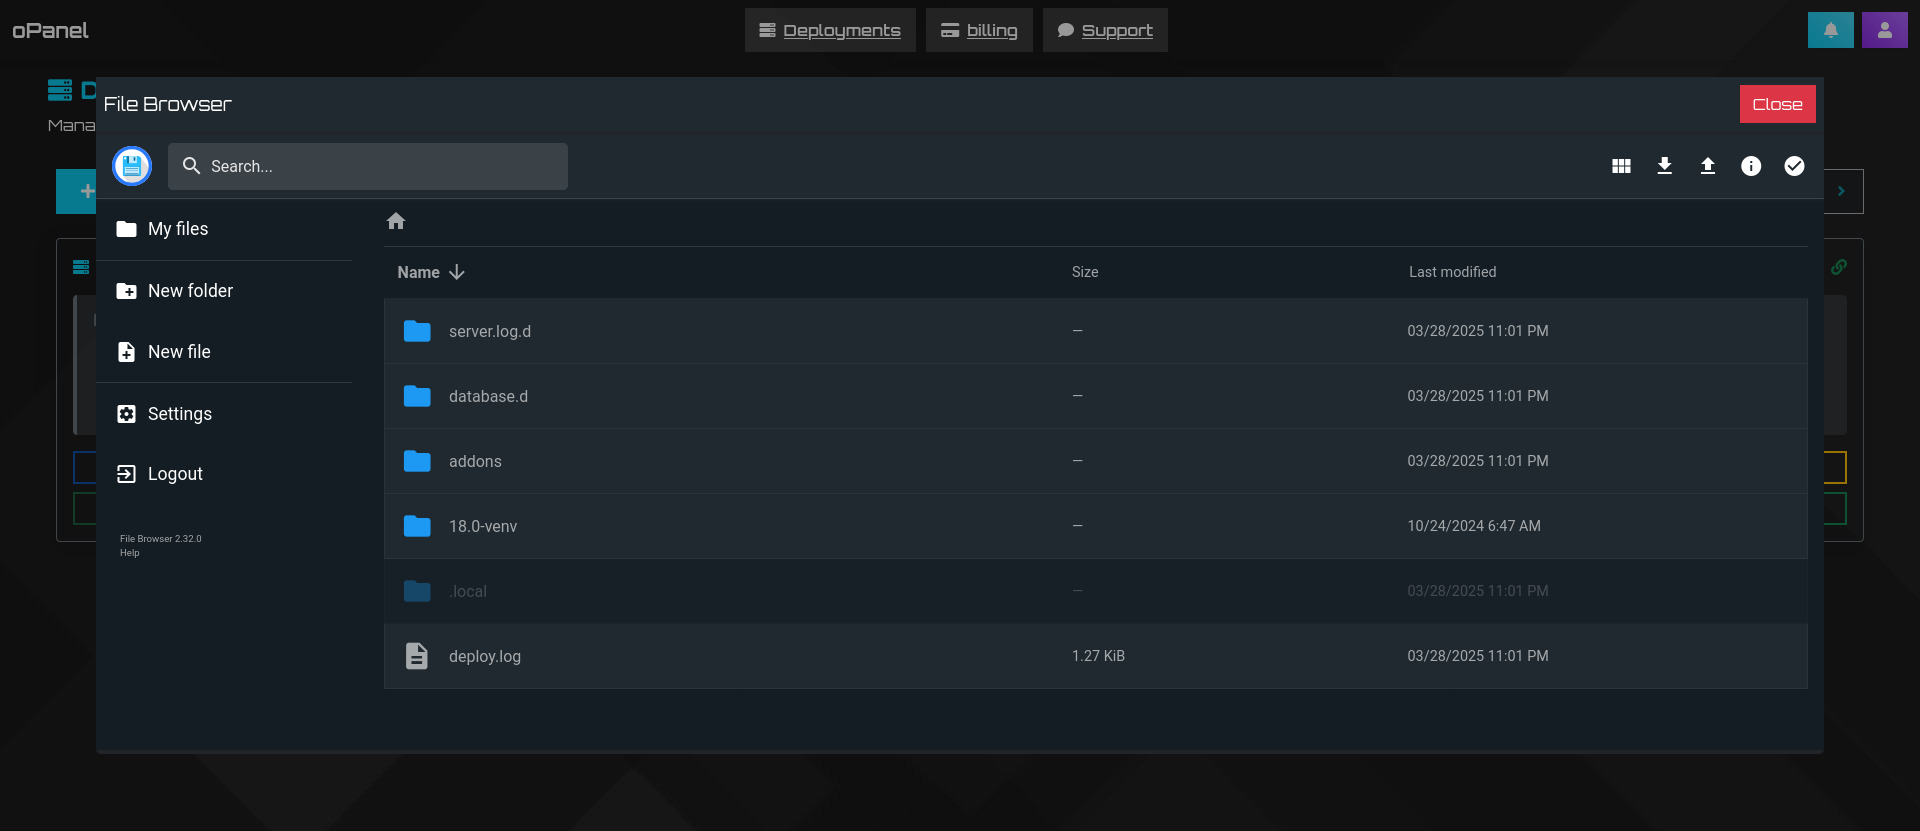
Deployment Files
For each deployment, you can manage files, upload custom modules, etc.
Common Issues and Solutions
- Clear browser cache and cookies
- Ensure you're using the correct email and password
- Use the password reset function if needed
- Check server status in the deployment panel
- Review logs for error messages
- Restart the server if necessary
- Ensure you haven't exceeded resource limits
- Verify payment method details are current
- Check for any declined transactions
- Contact support for billing discrepancies
Deployment Database
For each deployment, you can perform several database actions:

| Action | Description |
|---|---|
| START | Power up the server |
| STOP | Gracefully shut down the server |
| RESTART | Apply configuration changes and restart |
| LOGS |
Check server activity logs
|
| DUPLICATE | Create an identical copy of the server |
| DESTROY |
Permanently delete the server (requires confirmation)
|